Getting support for a computer issue is much easier when you can share your screen. Compared to describing your issue over the phone, the difference is night and day. Your Mac already comes with the software required to make this happen between two users on Apple computers. You can also share your screens across your own Macs.
And if you happen to need support from someone running Windows or Linux, we’ve got that covered too.
Use the Messages App for Screen Sharing on a Mac
The easiest way to share your screen, or request to view another user’s screen, is to use Apple’s Messages app. Through the Messages app on macOS, you can share your screen with another party, provided they are using a Mac and are signed in to iMessage with an Apple ID.
While sharing your screen, the other party will have the opportunity to control your computer by requesting access. This requires you explicitly provide permission via a popup dialog box. You should never relinquish control of your Mac to someone you do not know or trust absolutely.
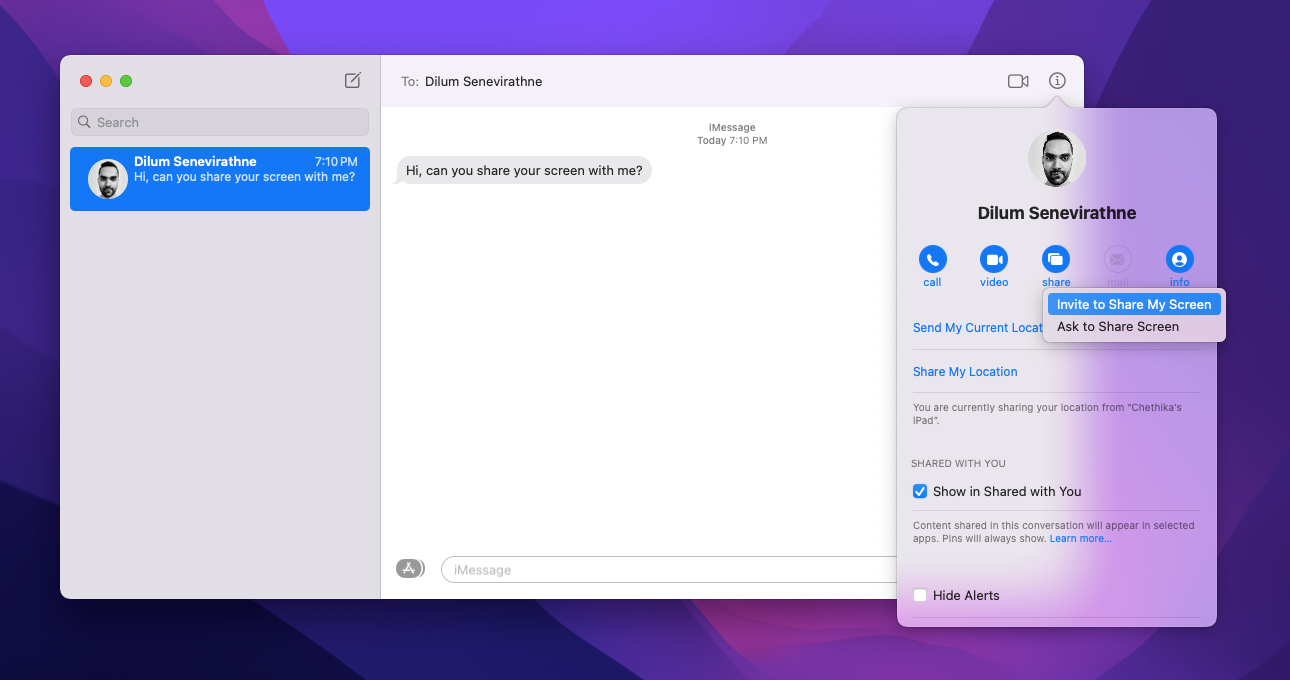
To get started, launch the Messages app and make sure you’re logged in to your Apple ID under Messages > Preferences. To share, or request, a screen share:
- Start a new chat with the person you want to share with.
- Click the Info icon in the top-right corner of the window.
- Click the Share button (it looks like two overlapping rectangles).
- Choose Invite to share my screen to share your own screen or Ask to share screen to request to see the other person’s screen.
The other party will need to agree to your request. Once they’ve confirmed it, an audio call will begin alongside screen sharing. You can then chat with the other party and discuss the problem (or whatever it is you’re sharing).
You can allow the other party to control your screen via the Share icon in the menu bar. Look in the top-right corner of your Mac’s screen for the two overlapping rectangles. Click it, and then choose Allow [contact] to control my screen.
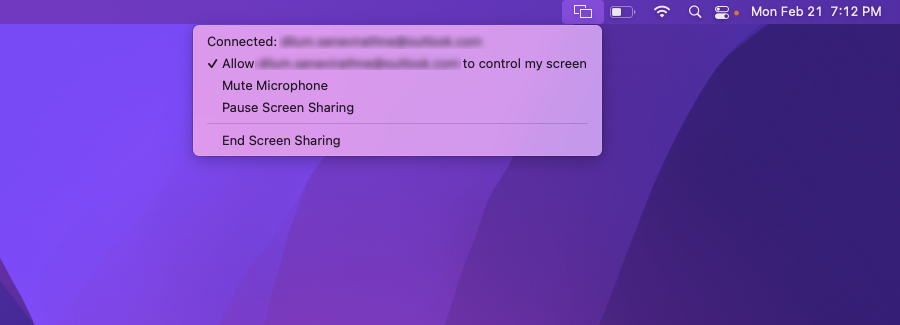
To undo your decision but still keep screen sharing active, click the Share menu bar icon again and uncheck this option. We’ve covered more on sharing your Mac’s screen via Messages if you need additional info.
Access Other Apple Computers via Local Network
Another way to share the screen from one Mac to another is to use an integrated feature called Screen Sharing, so long as both macOS devices are using the same local network. Screen sharing in this way also allows for full control over the shared Mac.
You’ll need to enable Screen Sharing on any Mac you want to access and control before you can use it. Here’s how to set up the feature on the Mac you want to control:
- Open the Apple menu and select System Preferences.
- Select the category labeled Sharing.
- Check the box next to Screen Sharing and note the IP address or hostname of the Mac.
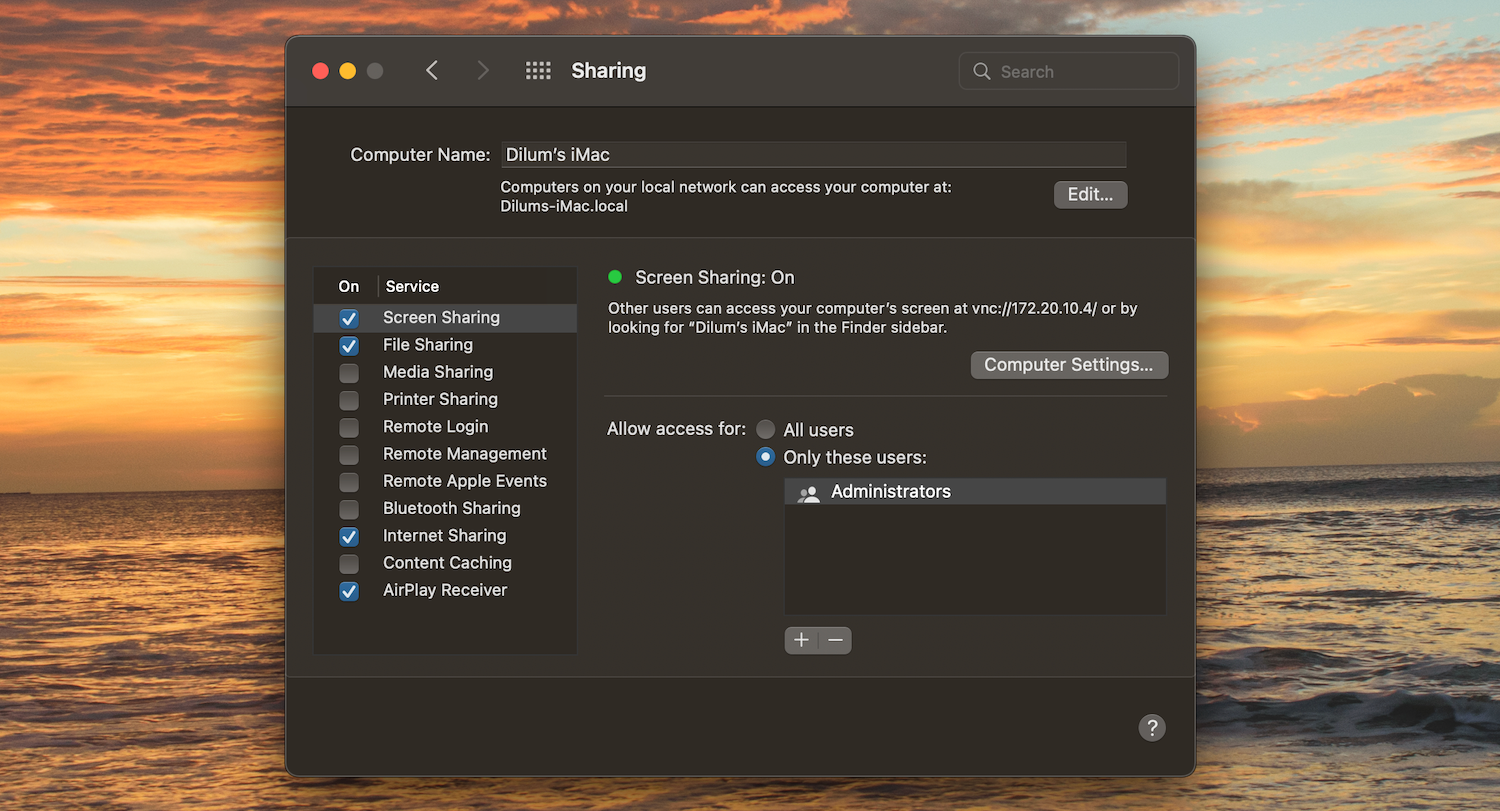
You can then access the Mac from another macOS device on the same local network with the following steps:
- Open the Screen Sharing app by searching for it via Spotlight (press Cmd + Space).
- Enter the IP address or hostname of the remote Mac and select Connect.
- Enter the account details of the remote Mac and select Sign In.
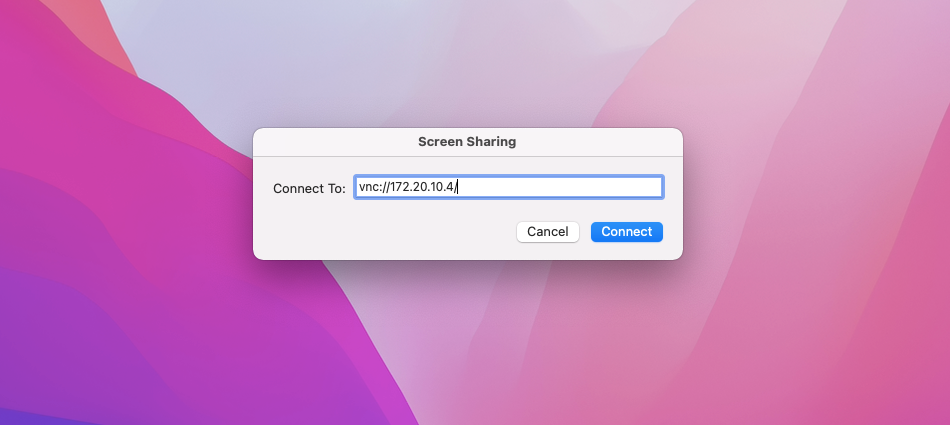
You’ll soon see your target computer’s screen show up in a new window on your desktop. As soon as the connection establishes, you can control this computer. If you have trouble connecting to the remote Mac, make sure that both devices are on the same local network and try again.
Use SharePlay to Share Screen in FaceTime Calls
If you use a Mac with macOS Monterey or later installed, you can use a feature called SharePlay to share your screen during FaceTime calls to other iOS, iPadOS, and macOS devices. SharePlay doesn’t give remote viewers the option to control your Mac, but it’s a great way to share the action in your screen with others. Here’s how to use it:
- Start a FaceTime call.
- Select the FaceTime icon on the menu bar.
- Select Window to share a select app window. Or, select Screen to share the entire screen of your Mac.

Mac Screen Sharing With Third-Party Apps
If you want to share your screen with someone who doesn’t use iMessage or someone who hasn’t got a Mac, you’ll need to rely on third-party apps to do so.
By far one of the easiest third-party tools to use is TeamViewer. You don’t need an account to use it—just download the Team Viewer remote control app to get started. This is all you need to receive support or offer support to others using the service. It’s also fully cross-platform, which means that it works seamlessly on Windows, Linux, iPhone, and Android.
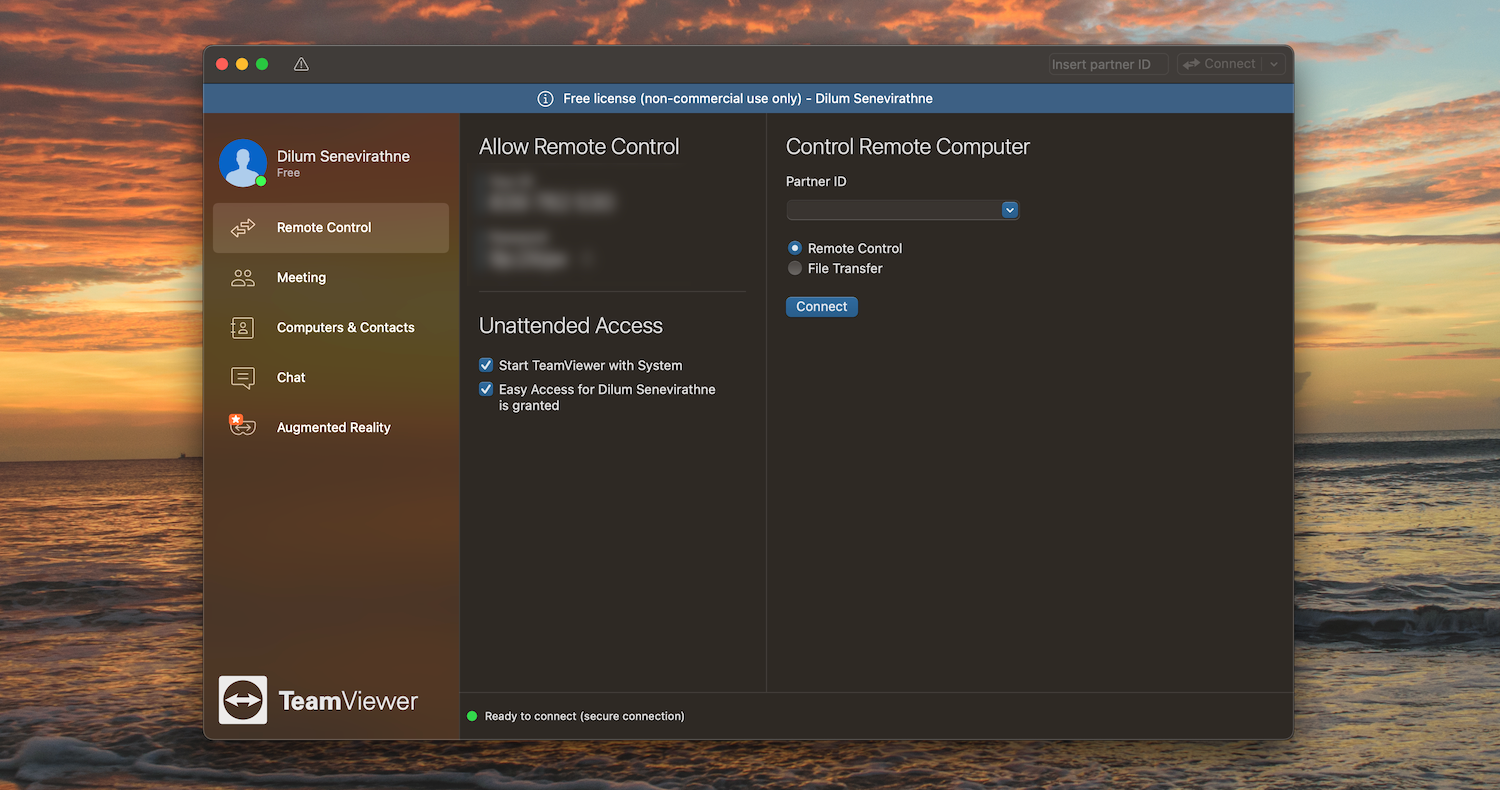
Once you’ve got the remote control application, you’ll have a user ID and a password. Give your user ID and password to someone else and they’ll be able to view your screen and control your Mac. The usual advice rings true as always: be careful who you trust!
Get Support and Work Remotely on a Mac
The easiest way to get help with a Mac computer problem is to share your screen via iMessage. For local networks, the integrated Screen Sharing functionality in macOS works a treat. SharePlay in FaceTime also helps, so long as you don’t want to relinquish control of your Mac.
And if you’re really stuck, you can always get computer support from a Windows, iPhone, or Android user via TeamViewer or another remote access app.
Read Next
About The Author


