Do you need to edit iPhone photos on a device that doesn’t support Apple’s HEIC format? No worries, you can convert your HEIC images to JPG on your Mac, then transfer the converted images to your device.
HEIC is still a relatively new format, and there are many devices and websites that don’t support this image format yet. If you need your photos to work with sites or devices that don’t support the format, it’s handy to know how to convert HEIC to JPG on a Mac.
What Is HEIC?
HEIC is a compressed image format that Apple began using as the default image format with iOS 11. If your iPhone or iPad runs iOS 11 or later, it saves your captured images in the HEIC format by default.
Since HEIC is mostly an Apple exclusive format, you won’t find much support for it on devices from other manufacturers. That’s one of the reasons you need to convert your HEIC images to a more widely used format such as JPG or JPEG.
Convert HEIC to JPG on a Mac Using Preview
The easiest way to change HEIC to JPG on a Mac is to use Preview. While you may think of this app as just a file viewer, it can also convert your images as well.
Here’s how you use Preview to convert your HEIC photos to JPG:
- Control-click your HEIC image and select Open With followed by Preview. You can double-click instead of Control-clicking if Preview is the default HEIC viewer on your Mac.
- When Preview opens, click the File menu and select Export.
- Choose JPEG from the Format dropdown menu, then drag the Quality slider to adjust the quality for your resulting file. Choose a folder to save your converted image in, then click Save.
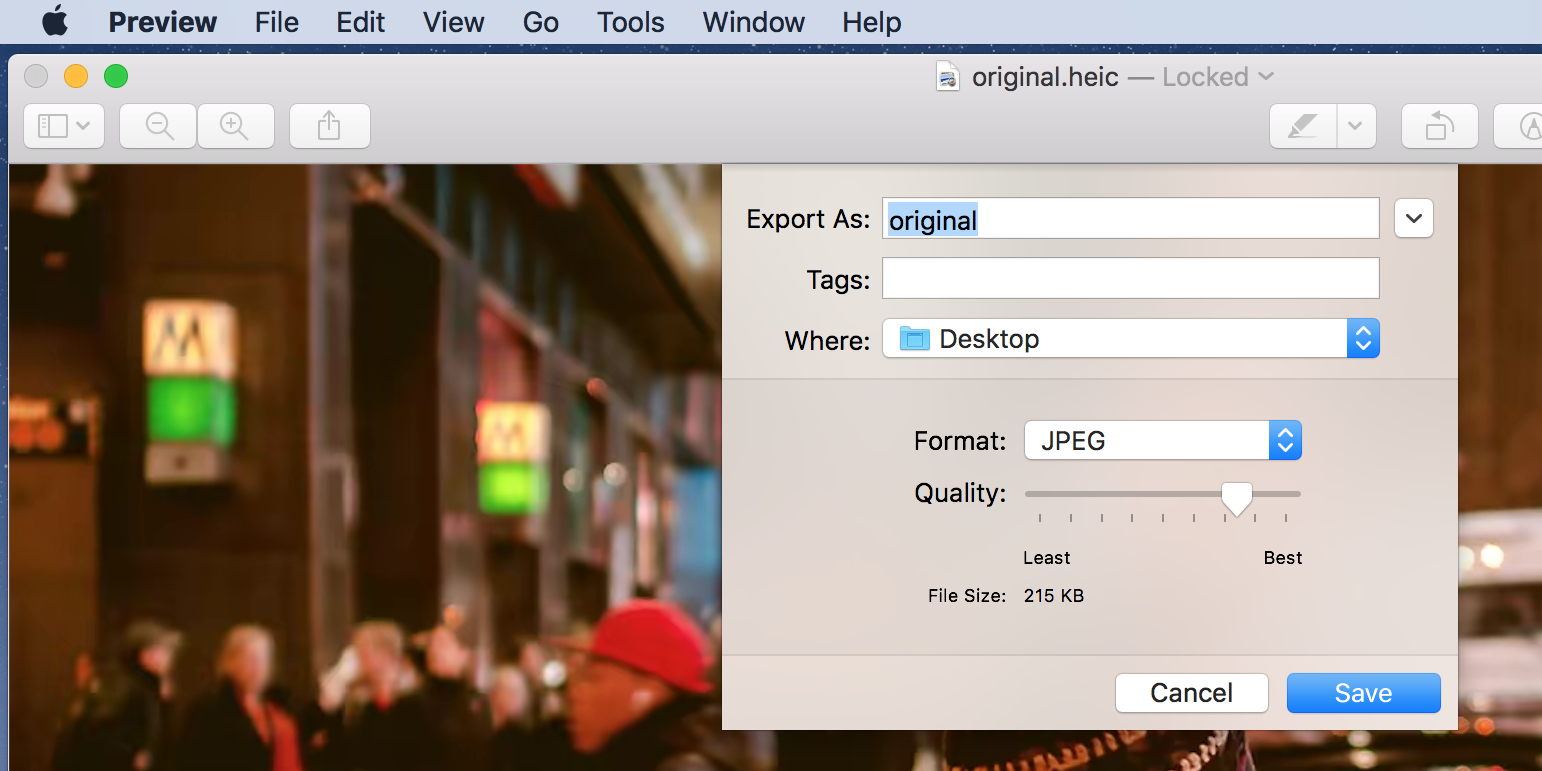
Preview will convert your HEIC photo and save it in the specified folder.
Use Photos to Change HEIC to JPG on a Mac
If your HEIC images are stored in the Photos app, you can use this app itself to convert all your HEIC images to JPG using Photos’ Export function.
Here’s how:
- If your HEIC image isn’t already in Photos, open Photos, click File, and select Import to add your HEIC photo to the app.
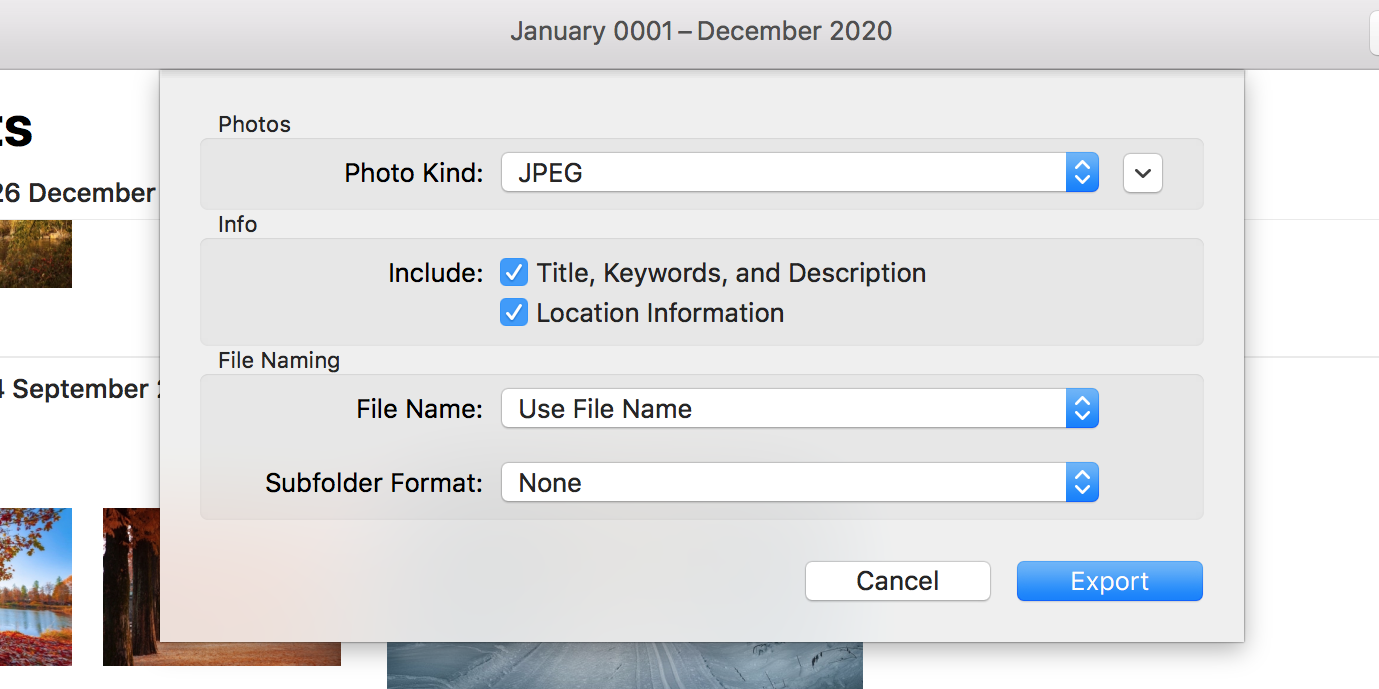
- Select your image in the app, click the File menu at the top, click Export, and choose Export X Photos (where X is the number of photos you’ve selected).
- Choose JPEG from the Photo Kind dropdown menu, review other options, and then click Export.
- Select a folder to save your converted image.
Use a Free Third-Party App to Convert HEIC to JPG on a Mac
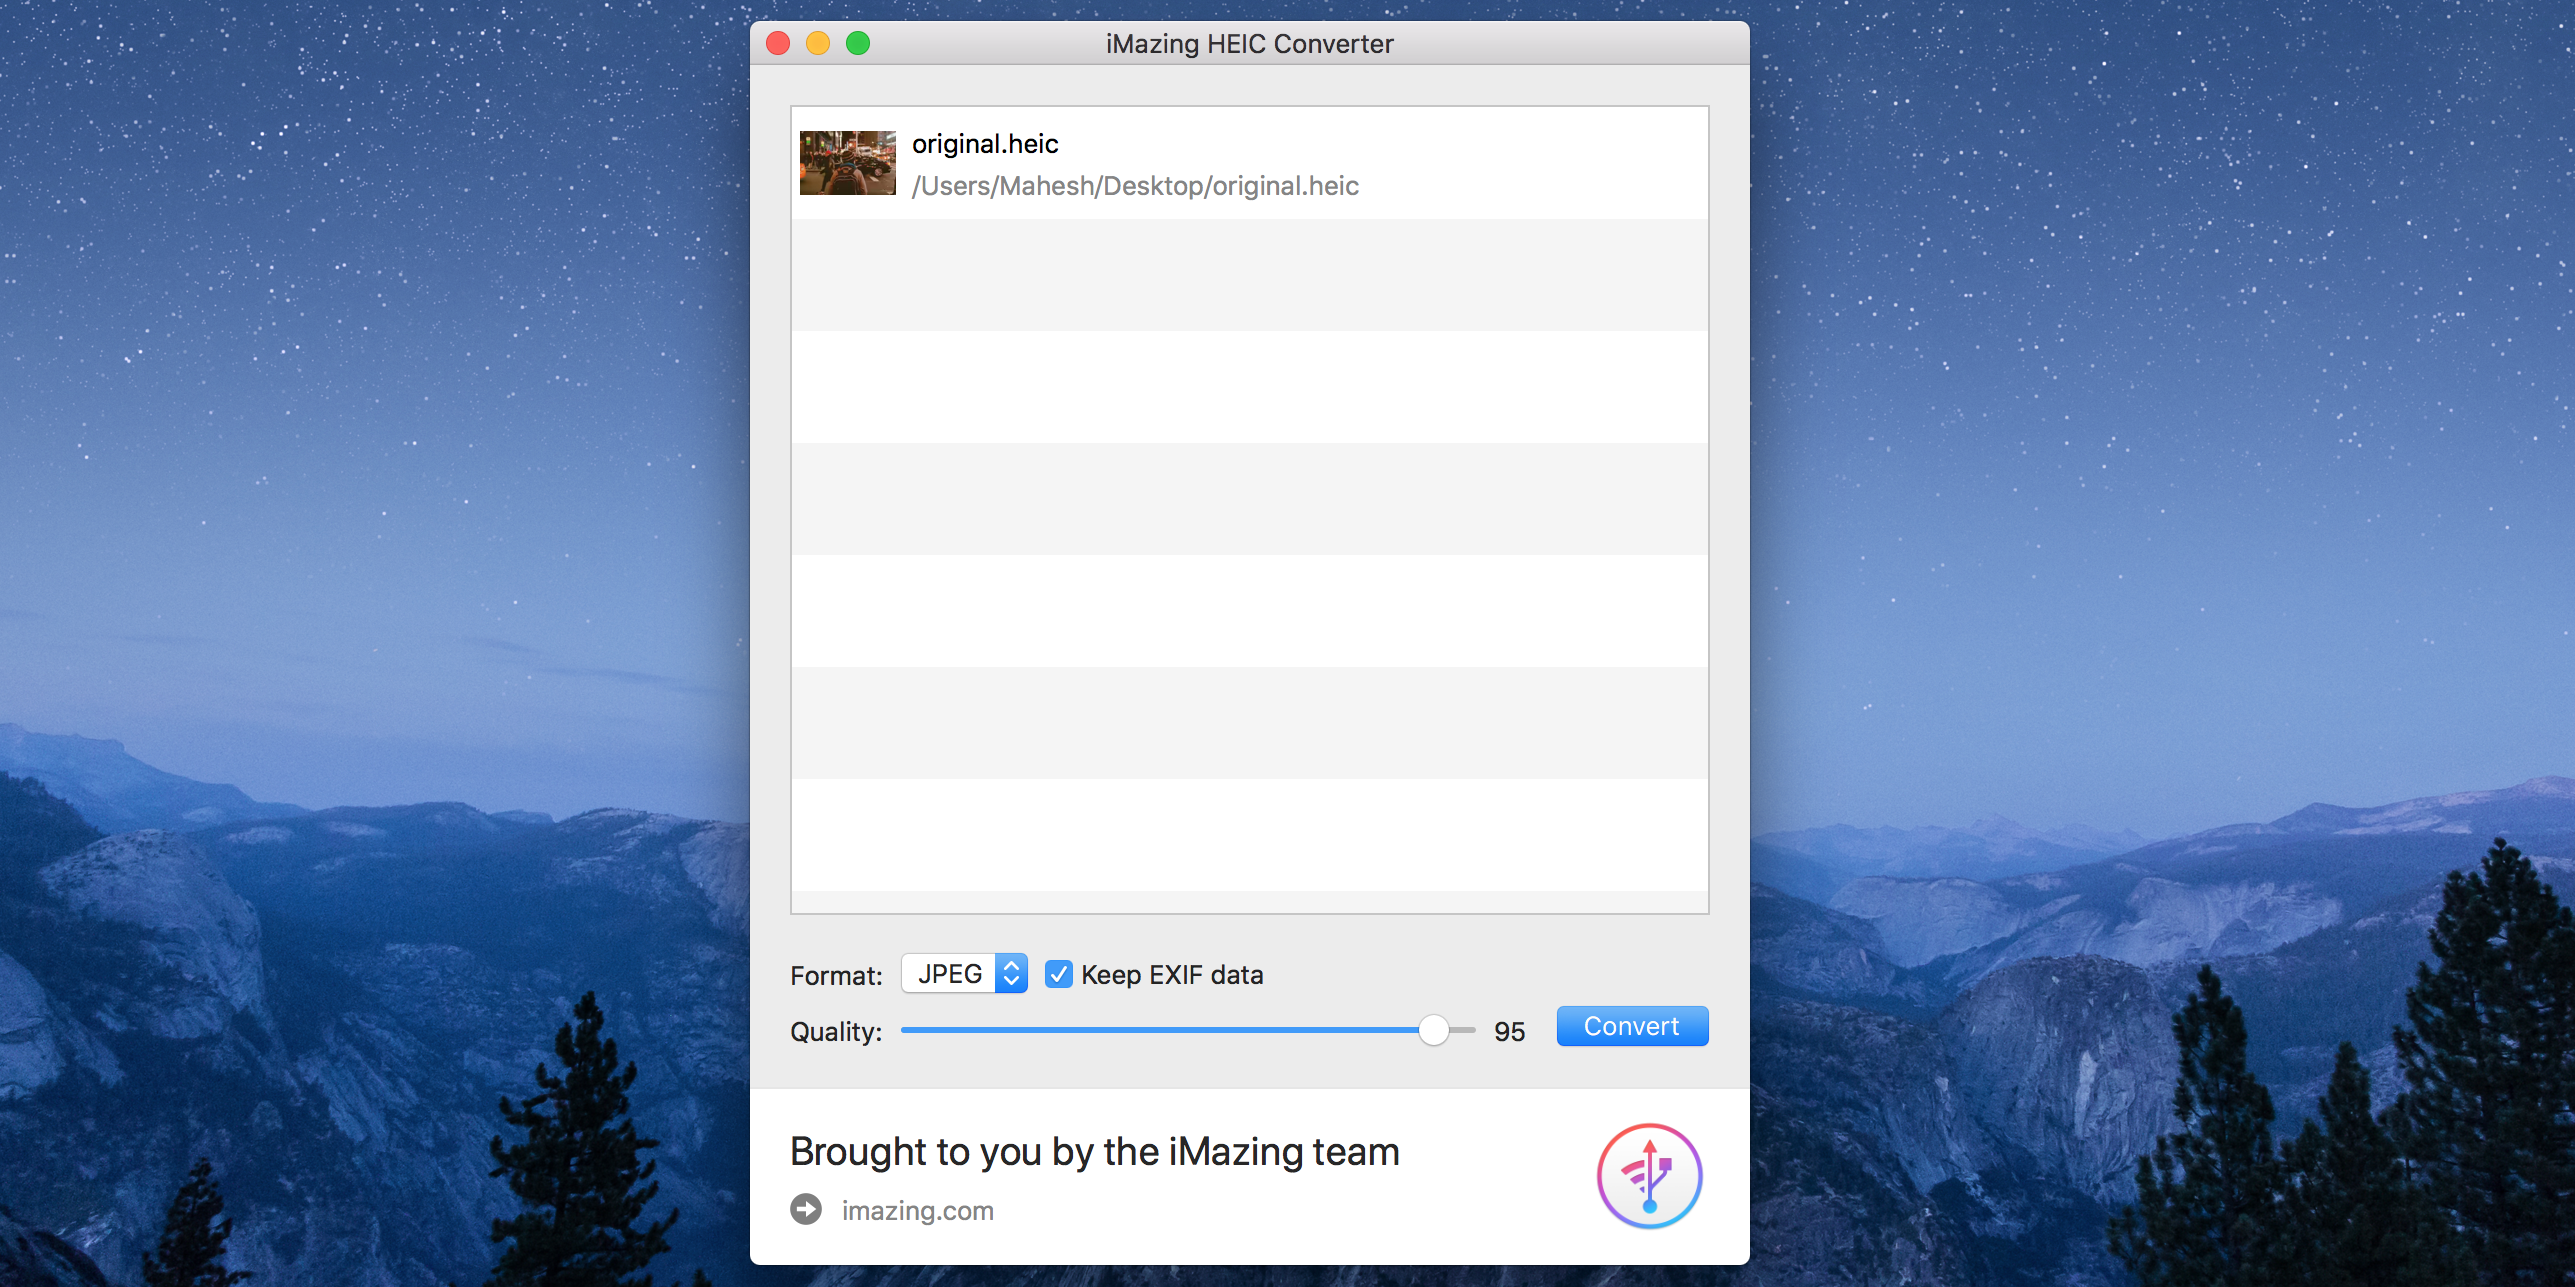
There are other apps that let you convert HEIC to JPG on your Mac. One of these apps is iMazing HEIC Converter (free). It lets you convert your images by dragging and dropping your photos onto the app interface.
Here’s how to convert your photos with this app:
- Download and install the free iMazing HEIC Converter app, if you haven’t already done so.
- Launch the app once it’s installed, and drag all your HEIC files onto the app interface.
- Choose JPEG from the Format dropdown menu, tick Keep EXIF data if you want to preserve that data, choose the image quality, and then click Convert.
- Select the folder where you want to save the converted images.
- Click Show Files to view your images when they are converted.
Make Your Photos More Accessible
HEIC is still a new format and it only works on certain devices. If you’re going to share your HEIC images with people that may use other devices, use one of the options above to convert your HEIC to JPG first. Once you’ve done that, you’re ready to share your photos with anyone you want.
Read Next
About The Author


