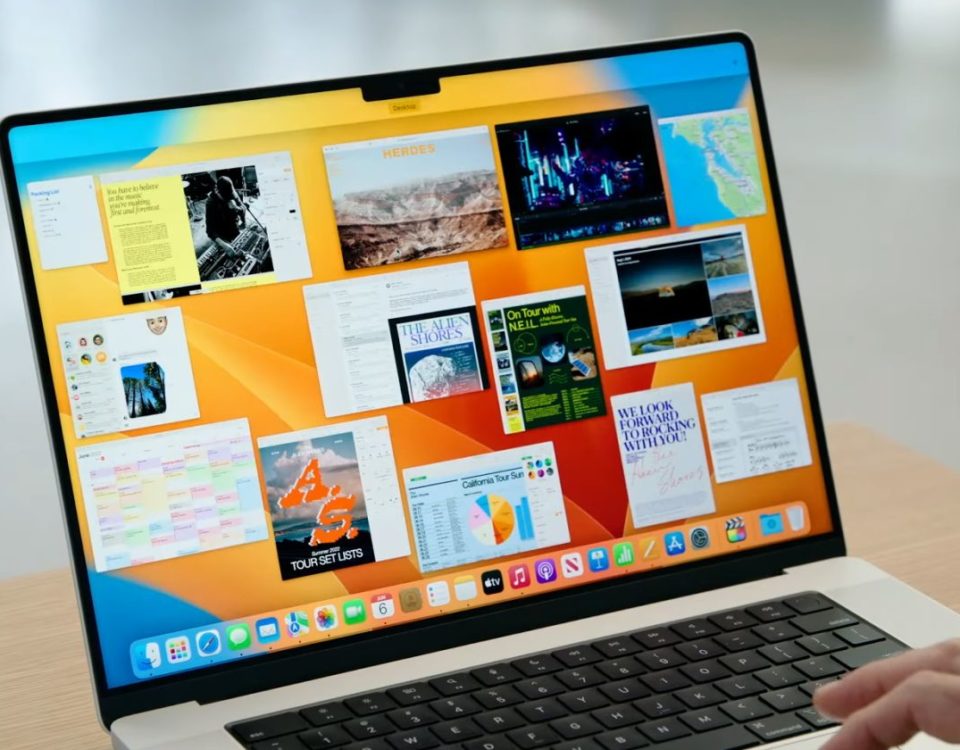
When you work with multiple applications in macOS, your desktop can get a little messy. Thankfully, Apple provides several tools you can use to make multitasking more manageable.
Whether you want to work with several apps on the same screen, utilize separate desktops, or simply switch between open windows quickly and easily, macOS has a solution. Let’s discuss Mission Control, Split View, and other tools for working with multiple applications on a Mac.
1. Mac Mission Control
Mission Control is one of the slickest features for working with multiple windows, applications, or desktops in macOS. A single key press allows you to access an easy-to-navigate view of all your open items, and additional key combinations let you quickly switch between spaces.
Generally, the F3 key activates Mission Control, although you can create custom shortcuts in System Preferences. By default, Control (⌃) + Up arrow (↑) also opens Mission Control, and Control (⌃) + Down arrow (↓) brings up a screen for viewing applications individually. In the latter view, you can use the Tab key to switch between apps and manage related windows.
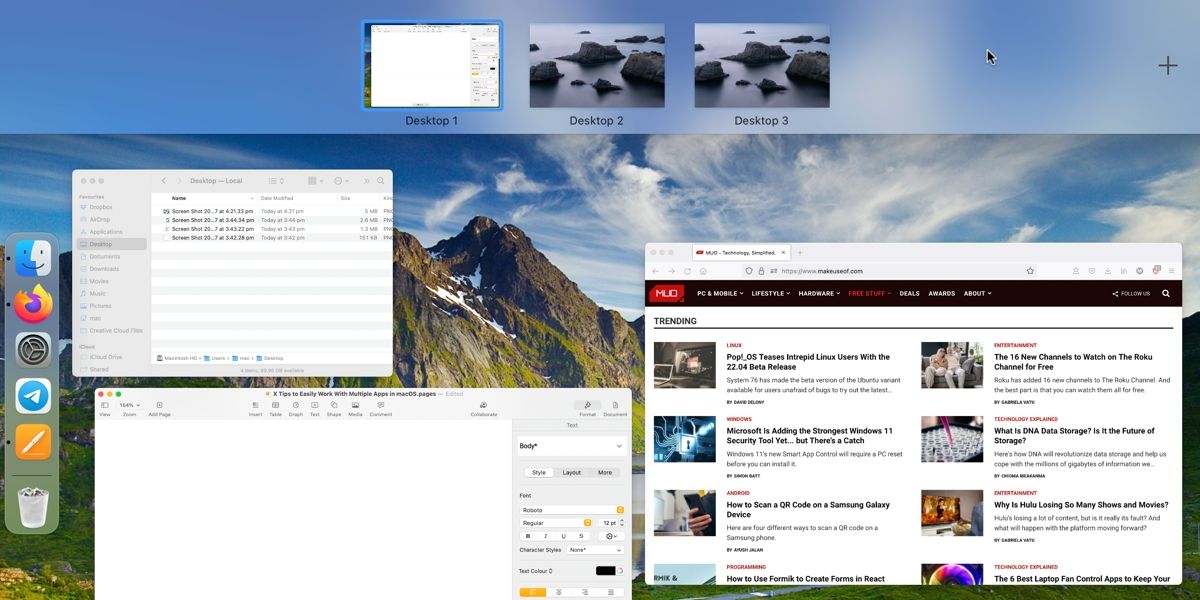
When you activate the Mission Control view, you’ll see the spaces bar at the top of the screen. From here, you can click the plus (+) button to add additional desktops or hold the Option key and click the X on a thumbnail to close that space. Currently, macOS allows a maximum of 16 active spaces at one time. If you want to switch between desktops without activating Mission Control, you can press Control (⌃) + Left arrow or Control (⌃) + Right arrow to quickly jump between spaces.
If you want to choose which apps appear on certain desktops, you can Control-click an item in the Dock, go to Options, and select either All Desktops, This Desktop, or None in the Assign To section.
Finally, you can access Mission Control settings in System Preferences > Mission Control. Customization options are sparse, but macOS does grant you some control over how the tool behaves.
2. Mac Split View
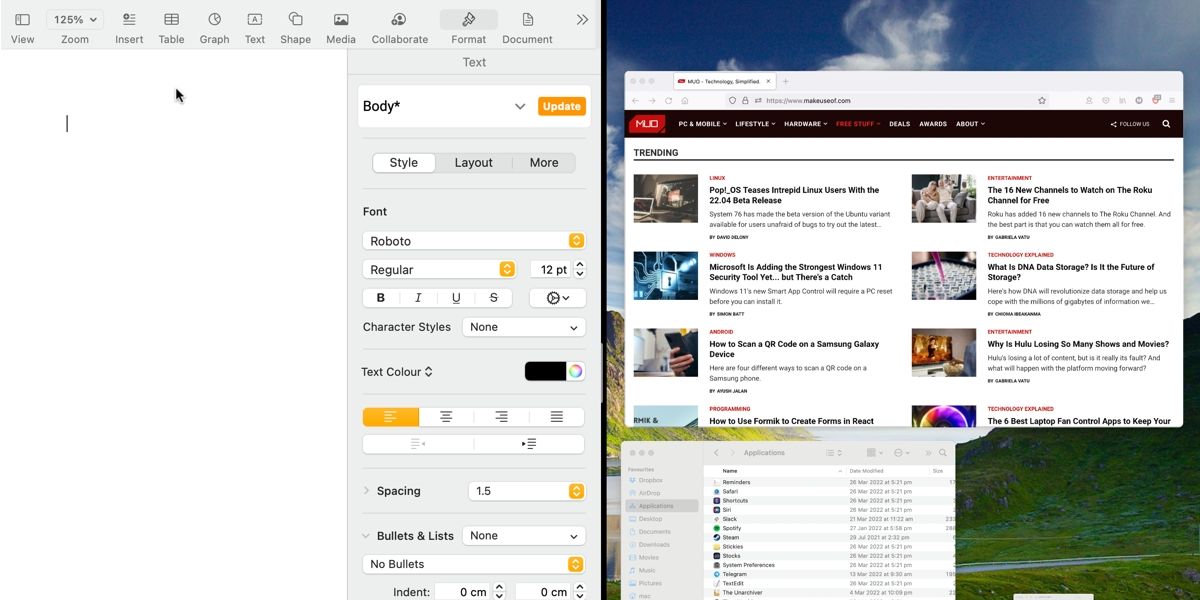
Split View is handy when you need to work with two apps simultaneously but don’t want to bother with additional spaces. Larger displays work best with this feature, as smaller screens can start to feel a little cramped
Here’s how to use Split View in macOS:
- Open the two applications you want to split.
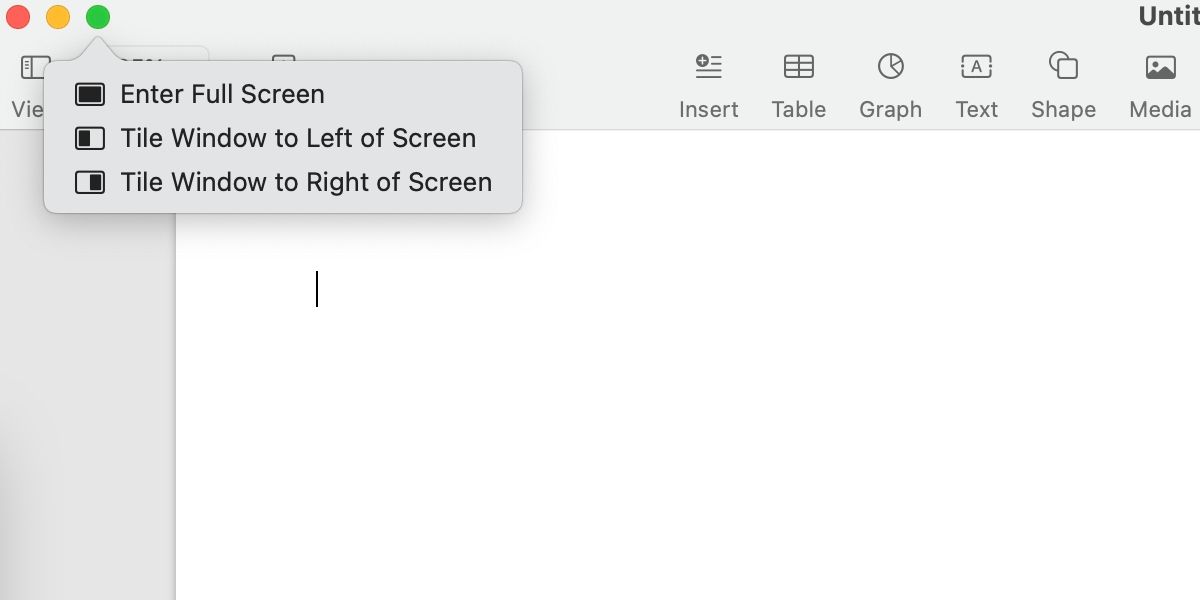
- In the first app, either hover your cursor over the Full Screen button or click and hold.
- Choose either Tile Window to Left of Screen or Tile Window to Right of Screen.
- Select the second app from the available windows.
You can exit Split View at any time by clicking the Full Screen button or pressing the Escape key.
3. Switch Between Mac Apps With Tab
If you’re familiar with Windows, you may know the Alt + Tab key combo for switching between open applications. Apple includes a similar feature in macOS that uses a slightly different combination:
- Switch right to left between open apps with Cmd (⌘) + Tab.
- Switch left to right between open apps with Shift (⇧) + Cmd (⌘) + Tab.
You can also use the left and right arrow keys to navigate the selection of open applications after pressing Cmd (⌘) + Tab. To do so, you must continue to hold the Cmd (⌘) key.
With the app selection panel open, you can also press the Q key to close the currently highlighted application.
4. Switch Between Windows of the Same App in macOS
When switching between apps using Cmd (⌘) + Tab, macOS doesn’t allow you to target specific windows of open applications. Luckily, another keyboard shortcut solves this issue.
If you press Cmd (⌘) + Grave accent (`), macOS will cycle between open windows of the current application. Depending on your keyboard, you may need to press Cmd (⌘) + Tilde (~) instead.
What’s the Best Method for Managing Multiple Apps in macOS?
No singular app management solution is ideal for every situation. In many cases, using a blend of the tools discussed will be best for enhancing efficiency and turning you into a multitasking machine.
Once you’ve mastered Mission Control and all other relevant features, you’ll achieve peak productivity and never miss a deadline again.
Read Next
About The Author


